Product Description:
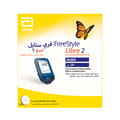
- The FreeStyle Libre 2 Flash Glucose Monitoring System Reader (“Reader”) when used with a FreeStyle Libre 2 Flash Glucose Monitoring System Sensor (“Sensor”) is indicated for measuring interstitial fluid glucose levels in people (age 4 and older) with diabetes mellitus, including pregnant women.
- The Reader and Sensor are designed to replace blood glucose testing in the self-management of diabetes, including dosing of insulin.
- The indication for children (age 4 - 12) is limited to those who are supervised by a caregiver who is at least 18 years of age.
- The caregiver is responsible for managing or assisting the child to manage the Reader and Sensor and also for interpreting or assisting the child to interpret Sensor glucose readings.
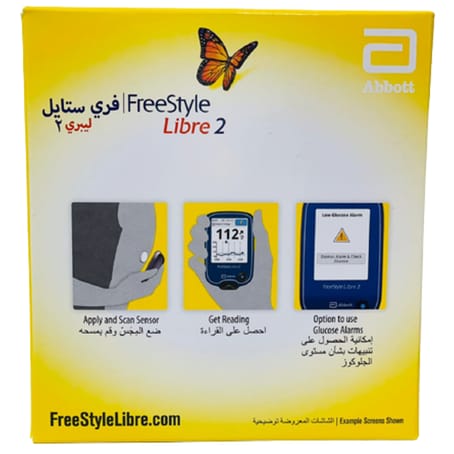
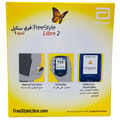
- The FreeStyle Libre 2 Flash Glucose Monitoring System (“System”) has two main parts: a handheld Reader and a disposable Sensor that you wear on your body.
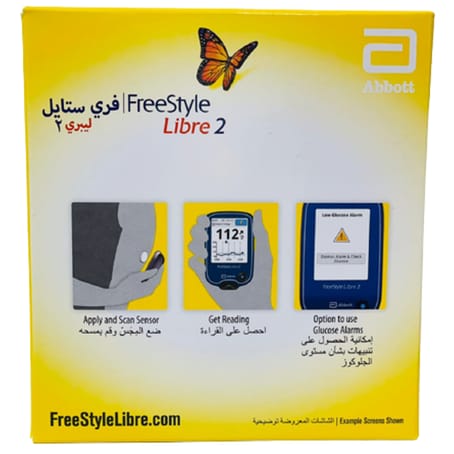
- You use the Reader to wirelessly scan the Sensor and display your glucose readings.
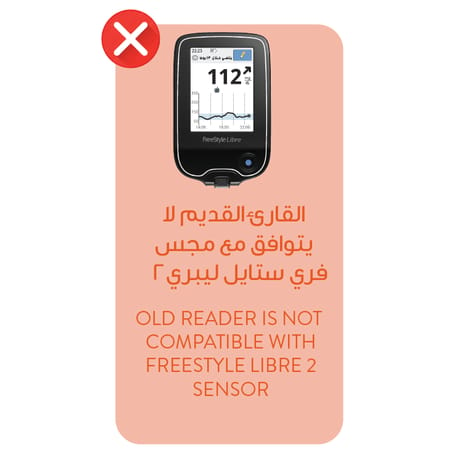
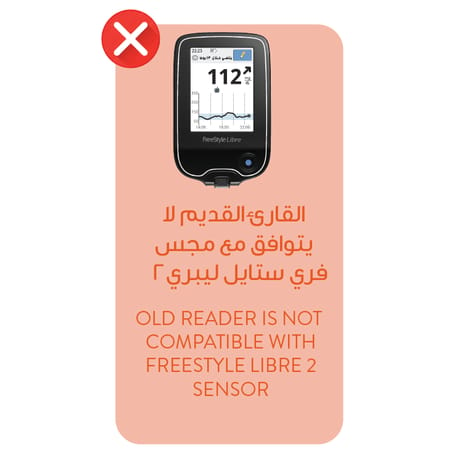
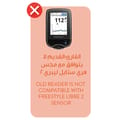
- The Reader only works with FreeStyle Libre 2 Sensors and cannot be used with other Sensors.
- The FreeStyle Libre 2 Sensor automatically communicates with the Reader and can give you glucose alarms if you choose to turn those on.
- The Reader also has a built-in meter for blood glucose and ketone testing.
- Your System comes in a Reader Kit and a Sensor Kit. When opening your kits, check that the contents are undamaged and that you have all parts listed. If any parts are missing or damaged, contact Customer Service.
- When in range of the Reader, your Sensor automatically communicates with the Reader to give you Low and High Glucose Alarms if you turn them ON.
- These alarms are turned OFF by default. This section explains how to turn on and set alarms as well as how to use them.
- Please read all the information in this section before setting and using alarms.
- IMPORTANT: What to know about glucose alarms
- Scan your Sensor often to check your glucose. If you get a Low or High Glucose Alarm, you must obtain a glucose result to determine what to do next.
- The Low and High Glucose Alarms should not be used exclusively to detect low or high glucose conditions.
- The glucose alarms should always be used along with your current glucose, glucose trend arrow, and glucose graph.
- Low and High Glucose Alarm levels are different from your Target Glucose Range values. Low and High Glucose Alarms tell you when your glucose has passed the level you set in the alarm.
- Your Target Glucose Range is displayed on glucose graphs on the Reader and used to calculate your Time In Target.
Setting up Your Reader for the First Time:
Before using the System for the first time, the Reader must be set up.
1. Press the Home Button to turn on the Reader.
2. If prompted, use the touchscreen to select your preferred language for the Reader. Touch OK to continue. Note: Use the pad of your finger. Do NOT use your fingernail or any other object on the screen.
3. Set the Current Date using the arrows on the touchscreen. Touch next to continue.
4. Set the Current Time. Touch next to continue.
CAUTION: It is very important to set the time and date correctly. These values affect the Reader data and settings.
5. The Reader now displays important information about two key topics to help you use the system:
• How to understand the Glucose Trend Arrow included on the Glucose Reading screen.
• How to return to the Home Screen from any other screen.
Touch next to move to the next topic. At the end of the Reader setup, touch done to go to the Home Screen.
Note: Charge the Reader if the battery level is low. Only use the USB cable and power adapter included with the System.
Checking Your Glucose:
1. Turn the Reader on by pressing the Home Button or touch Check Glucose from the Home Screen.
2. Hold the Reader within 4 cm (1.5 inches) of your Sensor to scan it. Your Sensor wirelessly sends glucose readings to the Reader. If sounds are turned on, the Reader beeps when the Sensor has been successfully scanned. Note: If the Sensor is not successfully scanned within 15 seconds, the Reader displays a prompt to scan the Sensor again. Touch OK to return to the Home Screen and touch Check Glucose to scan your Sensor.
3. The Reader displays your current glucose reading along with your glucose graph and an arrow indicating the direction your glucose is going.
Caution & Warnings:
Contraindications:
- The Sensor must be removed prior to Magnetic Resonance Imaging (MRI).
WARNING:
- Do not ignore symptoms that may be due to low or high blood glucose. If you have symptoms that do not match the Sensor glucose reading or suspect that your reading may be inaccurate, check the reading by conducting a fingerstick test using a blood glucose meter.
- If you are experiencing symptoms that are not consistent with your glucose readings, consult your health care professional.
- The FreeStyle Libre 2 Flash Glucose Monitoring System (“System”) contains small parts that may be dangerous if swallowed.
Cautions and Important System Information:
What the System has not been evaluated for:
- The System has not been evaluated for use with other implanted medical devices such as pacemakers.
- The System has not been evaluated for use in persons on dialysis or people less than 4 years of age.
How to store the Sensor:
- Store the Sensor Kit between 4°C and 25°C. While you don’t need to keep your Sensor Kit in a refrigerator, you can as long as the refrigerator is between 4°C and 25°C.
When is Sensor Glucose different from Blood Glucose:
- Glucose levels in the interstitial fluid can be different from blood glucose levels and may mean that Sensor glucose readings are different from blood glucose.
- You may notice this difference during times when your blood glucose is changing quickly, for example after eating, taking insulin, or exercising.
When to remove the Sensor:
- On rare occasions, you may get inaccurate Sensor glucose readings. If you believe your glucose readings are not correct or do not match how you feel, perform a blood glucose test on your finger to confirm your glucose. If the problem continues, remove your Sensor and apply a new one.
- Some individuals may be sensitive to the adhesive that keeps the Sensor attached to the skin. If you notice significant skin irritation around or under your Sensor, remove the Sensor and stop using the System. Contact your health care professional before continuing to use the System.
- If you have a medical appointment that includes strong magnetic or electromagnetic radiation, for example an X-ray, MRI (Magnetic Resonance Imaging), or CT (Computed Tomography) scan, remove the Sensor you are wearing and apply a new one after the appointment. The effect of these types of procedures on the performance of the system has not been evaluated.
What to know about wearing the Sensor:
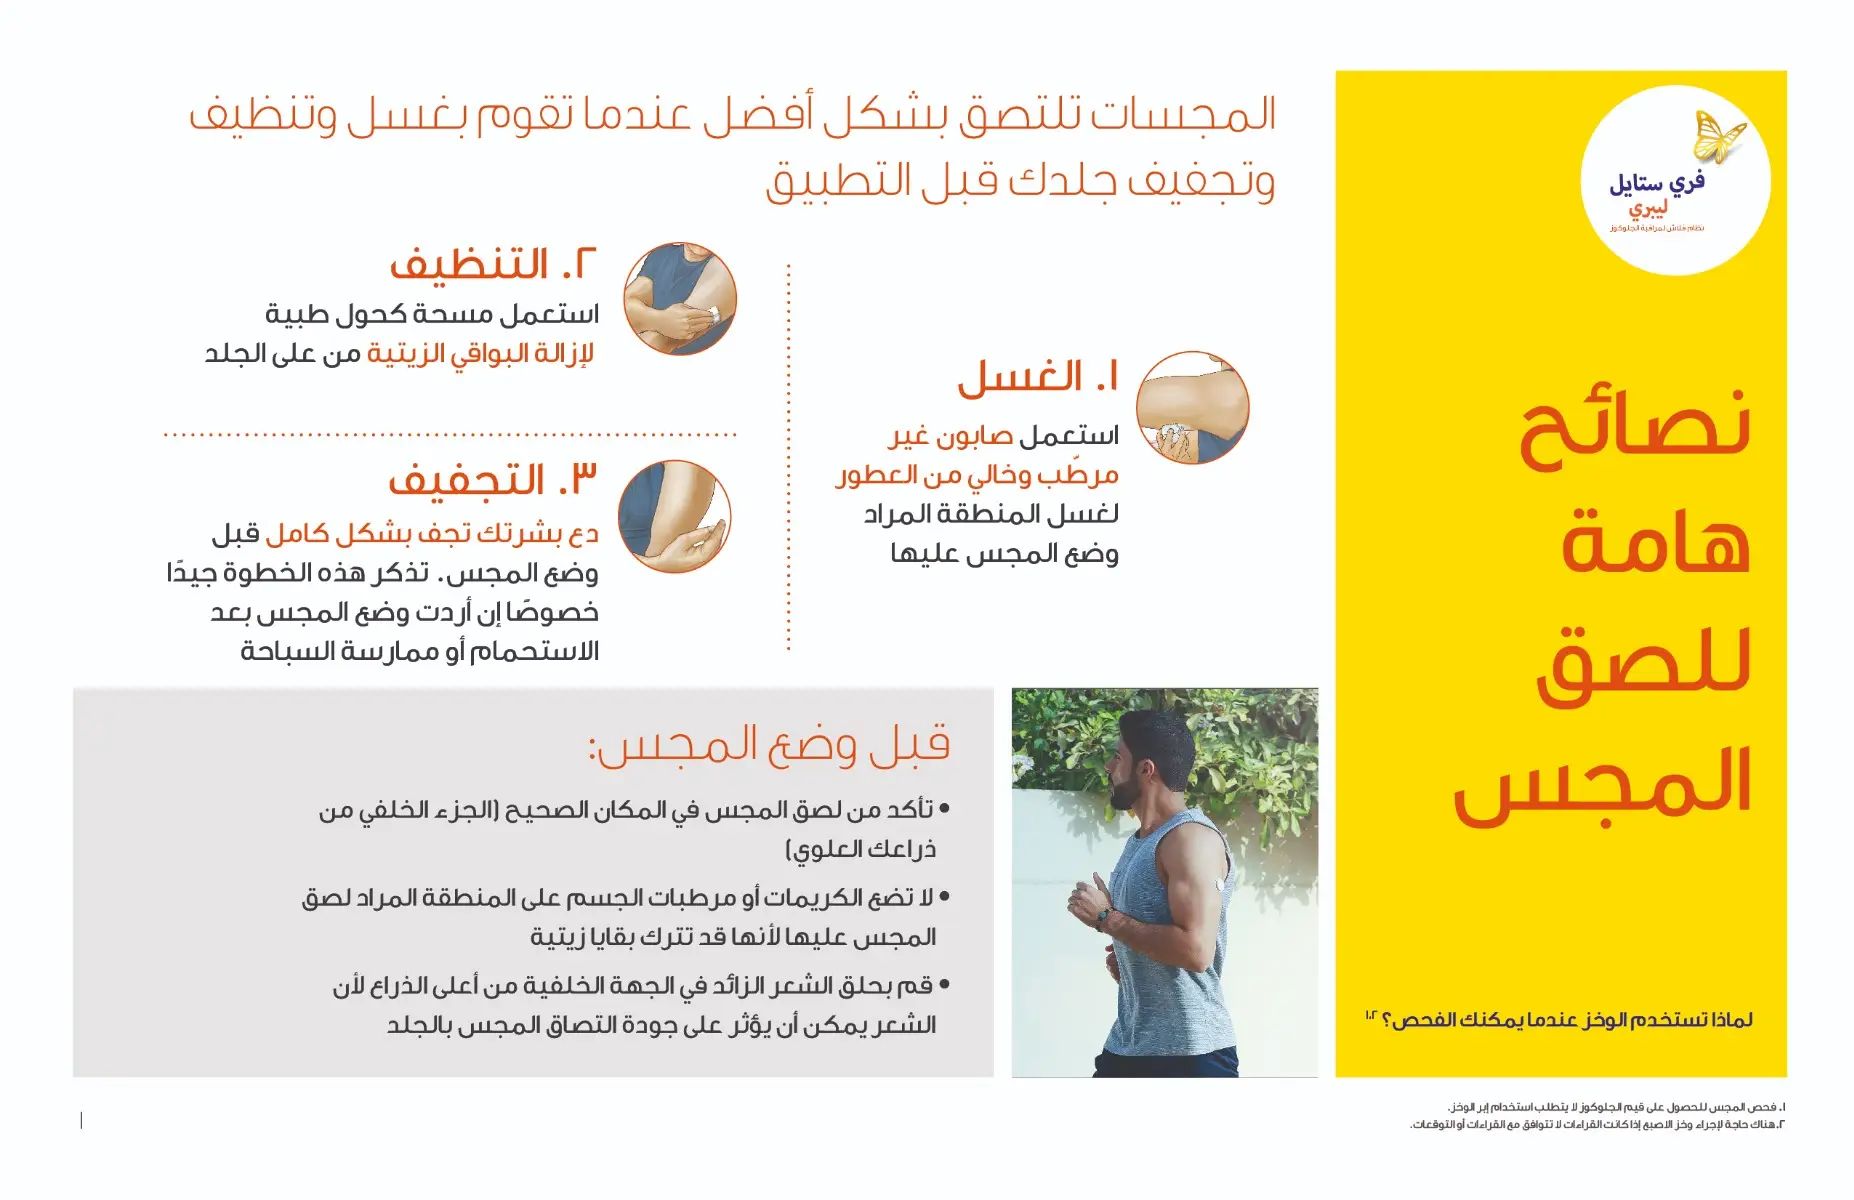
- Do not reuse Sensors.
- The Sensor and Sensor Applicator are designed for single use.
- Reuse may result in no glucose readings and infection.
- Not suitable for re-sterilization.
- Further exposure to irradiation may cause inaccurate results.
What to know about Glucose Alarms:
- For you to receive alarms, they must be turned ON and you should ensure that your Reader is within 6 metres (20 ft) of you at all times. The transmission range is 6 meters (20 ft) unobstructed. If you are out of range, you may not receive glucose alarms.
- To prevent missed alarms, make sure the Reader has sufficient charge and that sound and/or vibration are turned on.
What to know about the Reader’s Built-in Meter:
- The Reader is designed to be used only with FreeStyle Optium blood glucose and blood ketone test strips and MediSense control solution.
- The Reader is for use by a single person. It must not be used on more than one person including other family members due to the risk of spreading infection. All parts of the Reader are considered biohazardous and can potentially transmit infectious diseases, even after cleaning the Reader.
- Avoid getting dust, dirt, blood, control solution, water or other substances in the Reader’s USB and test strip ports.
Interfering Substances:
- You can take standard doses of ascorbic acid (vitamin C) and still make treatment decisions with the Sensor.
- Taking higher than the maximum recommended daily allowance (RDA) of ascorbic acid may affect the Sensor readings and make them look higher than they really are.
- Home
- Health &Wellness
- Diabetes support
- FreeStyle Libre 2 Reader
FreeStyle Libre 2 Reader
 250
250Loyalty Program
Loyalty
For each qualifying purchase you make, you will accumulate loyalty points. These points can then be redeemed for a variety of rewards such as discounts, exclusive, offers or even free products.
For Each
100
SAR
-->
100
POINTS
TIER2
100
SPAR SPEND
=
100
POINTS
TIER3
100
SPAR SPEND
=
100
POINTS
- Details

Product Description:
- The FreeStyle Libre 2 Flash Glucose Monitoring System Reader (“Reader”) when used with a FreeStyle Libre 2 Flash Glucose Monitoring System Sensor (“Sensor”) is indicated for measuring interstitial fluid glucose levels in people (age 4 and older) with diabetes mellitus, including pregnant women.
- The Reader and Sensor are designed to replace blood glucose testing in the self-management of diabetes, including dosing of insulin.
- The indication for children (age 4 - 12) is limited to those who are supervised by a caregiver who is at least 18 years of age.
- The caregiver is responsible for managing or assisting the child to manage the Reader and Sensor and also for interpreting or assisting the child to interpret Sensor glucose readings.
- The FreeStyle Libre 2 Flash Glucose Monitoring System (“System”) has two main parts: a handheld Reader and a disposable Sensor that you wear on your body.
- You use the Reader to wirelessly scan the Sensor and display your glucose readings.
- The Reader only works with FreeStyle Libre 2 Sensors and cannot be used with other Sensors.
- The FreeStyle Libre 2 Sensor automatically communicates with the Reader and can give you glucose alarms if you choose to turn those on.
- The Reader also has a built-in meter for blood glucose and ketone testing.
- Your System comes in a Reader Kit and a Sensor Kit. When opening your kits, check that the contents are undamaged and that you have all parts listed. If any parts are missing or damaged, contact Customer Service.
- When in range of the Reader, your Sensor automatically communicates with the Reader to give you Low and High Glucose Alarms if you turn them ON.
- These alarms are turned OFF by default. This section explains how to turn on and set alarms as well as how to use them.
- Please read all the information in this section before setting and using alarms.
- IMPORTANT: What to know about glucose alarms
- Scan your Sensor often to check your glucose. If you get a Low or High Glucose Alarm, you must obtain a glucose result to determine what to do next.
- The Low and High Glucose Alarms should not be used exclusively to detect low or high glucose conditions.
- The glucose alarms should always be used along with your current glucose, glucose trend arrow, and glucose graph.
- Low and High Glucose Alarm levels are different from your Target Glucose Range values. Low and High Glucose Alarms tell you when your glucose has passed the level you set in the alarm.
- Your Target Glucose Range is displayed on glucose graphs on the Reader and used to calculate your Time In Target.
Setting up Your Reader for the First Time:
Before using the System for the first time, the Reader must be set up.
1. Press the Home Button to turn on the Reader.2. If prompted, use the touchscreen to select your preferred language for the Reader. Touch OK to continue. Note: Use the pad of your finger. Do NOT use your fingernail or any other object on the screen.
3. Set the Current Date using the arrows on the touchscreen. Touch next to continue.
4. Set the Current Time. Touch next to continue.
CAUTION: It is very important to set the time and date correctly. These values affect the Reader data and settings.
5. The Reader now displays important information about two key topics to help you use the system:
• How to understand the Glucose Trend Arrow included on the Glucose Reading screen.
• How to return to the Home Screen from any other screen.
Touch next to move to the next topic. At the end of the Reader setup, touch done to go to the Home Screen.
Note: Charge the Reader if the battery level is low. Only use the USB cable and power adapter included with the System.

Checking Your Glucose:
1. Turn the Reader on by pressing the Home Button or touch Check Glucose from the Home Screen.
2. Hold the Reader within 4 cm (1.5 inches) of your Sensor to scan it. Your Sensor wirelessly sends glucose readings to the Reader. If sounds are turned on, the Reader beeps when the Sensor has been successfully scanned. Note: If the Sensor is not successfully scanned within 15 seconds, the Reader displays a prompt to scan the Sensor again. Touch OK to return to the Home Screen and touch Check Glucose to scan your Sensor.
3. The Reader displays your current glucose reading along with your glucose graph and an arrow indicating the direction your glucose is going.
Caution & Warnings:
Contraindications:
- The Sensor must be removed prior to Magnetic Resonance Imaging (MRI).
WARNING:

- Do not ignore symptoms that may be due to low or high blood glucose. If you have symptoms that do not match the Sensor glucose reading or suspect that your reading may be inaccurate, check the reading by conducting a fingerstick test using a blood glucose meter.
- If you are experiencing symptoms that are not consistent with your glucose readings, consult your health care professional.
- The FreeStyle Libre 2 Flash Glucose Monitoring System (“System”) contains small parts that may be dangerous if swallowed.
Cautions and Important System Information:
What the System has not been evaluated for:
- The System has not been evaluated for use with other implanted medical devices such as pacemakers.
- The System has not been evaluated for use in persons on dialysis or people less than 4 years of age.
How to store the Sensor:
- Store the Sensor Kit between 4°C and 25°C. While you don’t need to keep your Sensor Kit in a refrigerator, you can as long as the refrigerator is between 4°C and 25°C.
When is Sensor Glucose different from Blood Glucose:
- Glucose levels in the interstitial fluid can be different from blood glucose levels and may mean that Sensor glucose readings are different from blood glucose.
- You may notice this difference during times when your blood glucose is changing quickly, for example after eating, taking insulin, or exercising.
When to remove the Sensor:
- On rare occasions, you may get inaccurate Sensor glucose readings. If you believe your glucose readings are not correct or do not match how you feel, perform a blood glucose test on your finger to confirm your glucose. If the problem continues, remove your Sensor and apply a new one.
- Some individuals may be sensitive to the adhesive that keeps the Sensor attached to the skin. If you notice significant skin irritation around or under your Sensor, remove the Sensor and stop using the System. Contact your health care professional before continuing to use the System.
- If you have a medical appointment that includes strong magnetic or electromagnetic radiation, for example an X-ray, MRI (Magnetic Resonance Imaging), or CT (Computed Tomography) scan, remove the Sensor you are wearing and apply a new one after the appointment. The effect of these types of procedures on the performance of the system has not been evaluated.
What to know about wearing the Sensor:
- Do not reuse Sensors.
- The Sensor and Sensor Applicator are designed for single use.
- Reuse may result in no glucose readings and infection.
- Not suitable for re-sterilization.
- Further exposure to irradiation may cause inaccurate results.
What to know about Glucose Alarms:
- For you to receive alarms, they must be turned ON and you should ensure that your Reader is within 6 metres (20 ft) of you at all times. The transmission range is 6 meters (20 ft) unobstructed. If you are out of range, you may not receive glucose alarms.
- To prevent missed alarms, make sure the Reader has sufficient charge and that sound and/or vibration are turned on.
What to know about the Reader’s Built-in Meter:
- The Reader is designed to be used only with FreeStyle Optium blood glucose and blood ketone test strips and MediSense control solution.
- The Reader is for use by a single person. It must not be used on more than one person including other family members due to the risk of spreading infection. All parts of the Reader are considered biohazardous and can potentially transmit infectious diseases, even after cleaning the Reader.
- Avoid getting dust, dirt, blood, control solution, water or other substances in the Reader’s USB and test strip ports.
Interfering Substances:
- You can take standard doses of ascorbic acid (vitamin C) and still make treatment decisions with the Sensor.
- Taking higher than the maximum recommended daily allowance (RDA) of ascorbic acid may affect the Sensor readings and make them look higher than they really are.

Product Description:
- The FreeStyle Libre 2 Flash Glucose Monitoring System Reader (“Reader”) when used with a FreeStyle Libre 2 Flash Glucose Monitoring System Sensor (“Sensor”) is indicated for measuring interstitial fluid glucose levels in people (age 4 and older) with diabetes mellitus, including pregnant women.
- The Reader and Sensor are designed to replace blood glucose testing in the self-management of diabetes, including dosing of insulin.
- The indication for children (age 4 - 12) is limited to those who are supervised by a caregiver who is at least 18 years of age.
- The caregiver is responsible for managing or assisting the child to manage the Reader and Sensor and also for interpreting or assisting the child to interpret Sensor glucose readings.
- The FreeStyle Libre 2 Flash Glucose Monitoring System (“System”) has two main parts: a handheld Reader and a disposable Sensor that you wear on your body.
- You use the Reader to wirelessly scan the Sensor and display your glucose readings.
- The Reader only works with FreeStyle Libre 2 Sensors and cannot be used with other Sensors.
- The FreeStyle Libre 2 Sensor automatically communicates with the Reader and can give you glucose alarms if you choose to turn those on.
- The Reader also has a built-in meter for blood glucose and ketone testing.
- Your System comes in a Reader Kit and a Sensor Kit. When opening your kits, check that the contents are undamaged and that you have all parts listed. If any parts are missing or damaged, contact Customer Service.
- When in range of the Reader, your Sensor automatically communicates with the Reader to give you Low and High Glucose Alarms if you turn them ON.
- These alarms are turned OFF by default. This section explains how to turn on and set alarms as well as how to use them.
- Please read all the information in this section before setting and using alarms.
- IMPORTANT: What to know about glucose alarms
- Scan your Sensor often to check your glucose. If you get a Low or High Glucose Alarm, you must obtain a glucose result to determine what to do next.
- The Low and High Glucose Alarms should not be used exclusively to detect low or high glucose conditions.
- The glucose alarms should always be used along with your current glucose, glucose trend arrow, and glucose graph.
- Low and High Glucose Alarm levels are different from your Target Glucose Range values. Low and High Glucose Alarms tell you when your glucose has passed the level you set in the alarm.
- Your Target Glucose Range is displayed on glucose graphs on the Reader and used to calculate your Time In Target.
Setting up Your Reader for the First Time:
Before using the System for the first time, the Reader must be set up.
1. Press the Home Button to turn on the Reader.
2. If prompted, use the touchscreen to select your preferred language for the Reader. Touch OK to continue. Note: Use the pad of your finger. Do NOT use your fingernail or any other object on the screen.
3. Set the Current Date using the arrows on the touchscreen. Touch next to continue.
4. Set the Current Time. Touch next to continue.
CAUTION: It is very important to set the time and date correctly. These values affect the Reader data and settings.
5. The Reader now displays important information about two key topics to help you use the system:
• How to understand the Glucose Trend Arrow included on the Glucose Reading screen.
• How to return to the Home Screen from any other screen.
Touch next to move to the next topic. At the end of the Reader setup, touch done to go to the Home Screen.
Note: Charge the Reader if the battery level is low. Only use the USB cable and power adapter included with the System.

Checking Your Glucose:
1. Turn the Reader on by pressing the Home Button or touch Check Glucose from the Home Screen.
2. Hold the Reader within 4 cm (1.5 inches) of your Sensor to scan it. Your Sensor wirelessly sends glucose readings to the Reader. If sounds are turned on, the Reader beeps when the Sensor has been successfully scanned. Note: If the Sensor is not successfully scanned within 15 seconds, the Reader displays a prompt to scan the Sensor again. Touch OK to return to the Home Screen and touch Check Glucose to scan your Sensor.
3. The Reader displays your current glucose reading along with your glucose graph and an arrow indicating the direction your glucose is going.
Caution & Warnings:
Contraindications:
- The Sensor must be removed prior to Magnetic Resonance Imaging (MRI).
WARNING:

- Do not ignore symptoms that may be due to low or high blood glucose. If you have symptoms that do not match the Sensor glucose reading or suspect that your reading may be inaccurate, check the reading by conducting a fingerstick test using a blood glucose meter.
- If you are experiencing symptoms that are not consistent with your glucose readings, consult your health care professional.
- The FreeStyle Libre 2 Flash Glucose Monitoring System (“System”) contains small parts that may be dangerous if swallowed.
Cautions and Important System Information:
What the System has not been evaluated for:
- The System has not been evaluated for use with other implanted medical devices such as pacemakers.
- The System has not been evaluated for use in persons on dialysis or people less than 4 years of age.
How to store the Sensor:
- Store the Sensor Kit between 4°C and 25°C. While you don’t need to keep your Sensor Kit in a refrigerator, you can as long as the refrigerator is between 4°C and 25°C.
When is Sensor Glucose different from Blood Glucose:
- Glucose levels in the interstitial fluid can be different from blood glucose levels and may mean that Sensor glucose readings are different from blood glucose.
- You may notice this difference during times when your blood glucose is changing quickly, for example after eating, taking insulin, or exercising.
When to remove the Sensor:
- On rare occasions, you may get inaccurate Sensor glucose readings. If you believe your glucose readings are not correct or do not match how you feel, perform a blood glucose test on your finger to confirm your glucose. If the problem continues, remove your Sensor and apply a new one.
- Some individuals may be sensitive to the adhesive that keeps the Sensor attached to the skin. If you notice significant skin irritation around or under your Sensor, remove the Sensor and stop using the System. Contact your health care professional before continuing to use the System.
- If you have a medical appointment that includes strong magnetic or electromagnetic radiation, for example an X-ray, MRI (Magnetic Resonance Imaging), or CT (Computed Tomography) scan, remove the Sensor you are wearing and apply a new one after the appointment. The effect of these types of procedures on the performance of the system has not been evaluated.
What to know about wearing the Sensor:
- Do not reuse Sensors.
- The Sensor and Sensor Applicator are designed for single use.
- Reuse may result in no glucose readings and infection.
- Not suitable for re-sterilization.
- Further exposure to irradiation may cause inaccurate results.
What to know about Glucose Alarms:
- For you to receive alarms, they must be turned ON and you should ensure that your Reader is within 6 metres (20 ft) of you at all times. The transmission range is 6 meters (20 ft) unobstructed. If you are out of range, you may not receive glucose alarms.
- To prevent missed alarms, make sure the Reader has sufficient charge and that sound and/or vibration are turned on.
What to know about the Reader’s Built-in Meter:
- The Reader is designed to be used only with FreeStyle Optium blood glucose and blood ketone test strips and MediSense control solution.
- The Reader is for use by a single person. It must not be used on more than one person including other family members due to the risk of spreading infection. All parts of the Reader are considered biohazardous and can potentially transmit infectious diseases, even after cleaning the Reader.
- Avoid getting dust, dirt, blood, control solution, water or other substances in the Reader’s USB and test strip ports.
Interfering Substances:
- You can take standard doses of ascorbic acid (vitamin C) and still make treatment decisions with the Sensor.
- Taking higher than the maximum recommended daily allowance (RDA) of ascorbic acid may affect the Sensor readings and make them look higher than they really are.

Product Description:
- The FreeStyle Libre 2 Flash Glucose Monitoring System Reader (“Reader”) when used with a FreeStyle Libre 2 Flash Glucose Monitoring System Sensor (“Sensor”) is indicated for measuring interstitial fluid glucose levels in people (age 4 and older) with diabetes mellitus, including pregnant women.
- The Reader and Sensor are designed to replace blood glucose testing in the self-management of diabetes, including dosing of insulin.
- The indication for children (age 4 - 12) is limited to those who are supervised by a caregiver who is at least 18 years of age.
- The caregiver is responsible for managing or assisting the child to manage the Reader and Sensor and also for interpreting or assisting the child to interpret Sensor glucose readings.
- The FreeStyle Libre 2 Flash Glucose Monitoring System (“System”) has two main parts: a handheld Reader and a disposable Sensor that you wear on your body.
- You use the Reader to wirelessly scan the Sensor and display your glucose readings.
- The Reader only works with FreeStyle Libre 2 Sensors and cannot be used with other Sensors.
- The FreeStyle Libre 2 Sensor automatically communicates with the Reader and can give you glucose alarms if you choose to turn those on.
- The Reader also has a built-in meter for blood glucose and ketone testing.
- Your System comes in a Reader Kit and a Sensor Kit. When opening your kits, check that the contents are undamaged and that you have all parts listed. If any parts are missing or damaged, contact Customer Service.
- When in range of the Reader, your Sensor automatically communicates with the Reader to give you Low and High Glucose Alarms if you turn them ON.
- These alarms are turned OFF by default. This section explains how to turn on and set alarms as well as how to use them.
- Please read all the information in this section before setting and using alarms.
- IMPORTANT: What to know about glucose alarms
- Scan your Sensor often to check your glucose. If you get a Low or High Glucose Alarm, you must obtain a glucose result to determine what to do next.
- The Low and High Glucose Alarms should not be used exclusively to detect low or high glucose conditions.
- The glucose alarms should always be used along with your current glucose, glucose trend arrow, and glucose graph.
- Low and High Glucose Alarm levels are different from your Target Glucose Range values. Low and High Glucose Alarms tell you when your glucose has passed the level you set in the alarm.
- Your Target Glucose Range is displayed on glucose graphs on the Reader and used to calculate your Time In Target.
Setting up Your Reader for the First Time:
Before using the System for the first time, the Reader must be set up.
1. Press the Home Button to turn on the Reader.
2. If prompted, use the touchscreen to select your preferred language for the Reader. Touch OK to continue. Note: Use the pad of your finger. Do NOT use your fingernail or any other object on the screen.
3. Set the Current Date using the arrows on the touchscreen. Touch next to continue.
4. Set the Current Time. Touch next to continue.
CAUTION: It is very important to set the time and date correctly. These values affect the Reader data and settings.
5. The Reader now displays important information about two key topics to help you use the system:
• How to understand the Glucose Trend Arrow included on the Glucose Reading screen.
• How to return to the Home Screen from any other screen.
Touch next to move to the next topic. At the end of the Reader setup, touch done to go to the Home Screen.
Note: Charge the Reader if the battery level is low. Only use the USB cable and power adapter included with the System.

Checking Your Glucose:
1. Turn the Reader on by pressing the Home Button or touch Check Glucose from the Home Screen.
2. Hold the Reader within 4 cm (1.5 inches) of your Sensor to scan it. Your Sensor wirelessly sends glucose readings to the Reader. If sounds are turned on, the Reader beeps when the Sensor has been successfully scanned. Note: If the Sensor is not successfully scanned within 15 seconds, the Reader displays a prompt to scan the Sensor again. Touch OK to return to the Home Screen and touch Check Glucose to scan your Sensor.
3. The Reader displays your current glucose reading along with your glucose graph and an arrow indicating the direction your glucose is going.
Caution & Warnings:
Contraindications:
- The Sensor must be removed prior to Magnetic Resonance Imaging (MRI).
WARNING:

- Do not ignore symptoms that may be due to low or high blood glucose. If you have symptoms that do not match the Sensor glucose reading or suspect that your reading may be inaccurate, check the reading by conducting a fingerstick test using a blood glucose meter.
- If you are experiencing symptoms that are not consistent with your glucose readings, consult your health care professional.
- The FreeStyle Libre 2 Flash Glucose Monitoring System (“System”) contains small parts that may be dangerous if swallowed.
Cautions and Important System Information:
What the System has not been evaluated for:
- The System has not been evaluated for use with other implanted medical devices such as pacemakers.
- The System has not been evaluated for use in persons on dialysis or people less than 4 years of age.
How to store the Sensor:
- Store the Sensor Kit between 4°C and 25°C. While you don’t need to keep your Sensor Kit in a refrigerator, you can as long as the refrigerator is between 4°C and 25°C.
When is Sensor Glucose different from Blood Glucose:
- Glucose levels in the interstitial fluid can be different from blood glucose levels and may mean that Sensor glucose readings are different from blood glucose.
- You may notice this difference during times when your blood glucose is changing quickly, for example after eating, taking insulin, or exercising.
When to remove the Sensor:
- On rare occasions, you may get inaccurate Sensor glucose readings. If you believe your glucose readings are not correct or do not match how you feel, perform a blood glucose test on your finger to confirm your glucose. If the problem continues, remove your Sensor and apply a new one.
- Some individuals may be sensitive to the adhesive that keeps the Sensor attached to the skin. If you notice significant skin irritation around or under your Sensor, remove the Sensor and stop using the System. Contact your health care professional before continuing to use the System.
- If you have a medical appointment that includes strong magnetic or electromagnetic radiation, for example an X-ray, MRI (Magnetic Resonance Imaging), or CT (Computed Tomography) scan, remove the Sensor you are wearing and apply a new one after the appointment. The effect of these types of procedures on the performance of the system has not been evaluated.
What to know about wearing the Sensor:
- Do not reuse Sensors.
- The Sensor and Sensor Applicator are designed for single use.
- Reuse may result in no glucose readings and infection.
- Not suitable for re-sterilization.
- Further exposure to irradiation may cause inaccurate results.
What to know about Glucose Alarms:
- For you to receive alarms, they must be turned ON and you should ensure that your Reader is within 6 metres (20 ft) of you at all times. The transmission range is 6 meters (20 ft) unobstructed. If you are out of range, you may not receive glucose alarms.
- To prevent missed alarms, make sure the Reader has sufficient charge and that sound and/or vibration are turned on.
What to know about the Reader’s Built-in Meter:
- The Reader is designed to be used only with FreeStyle Optium blood glucose and blood ketone test strips and MediSense control solution.
- The Reader is for use by a single person. It must not be used on more than one person including other family members due to the risk of spreading infection. All parts of the Reader are considered biohazardous and can potentially transmit infectious diseases, even after cleaning the Reader.
- Avoid getting dust, dirt, blood, control solution, water or other substances in the Reader’s USB and test strip ports.
Interfering Substances:
- You can take standard doses of ascorbic acid (vitamin C) and still make treatment decisions with the Sensor.
- Taking higher than the maximum recommended daily allowance (RDA) of ascorbic acid may affect the Sensor readings and make them look higher than they really are.

Product Description:
- The FreeStyle Libre 2 Flash Glucose Monitoring System Reader (“Reader”) when used with a FreeStyle Libre 2 Flash Glucose Monitoring System Sensor (“Sensor”) is indicated for measuring interstitial fluid glucose levels in people (age 4 and older) with diabetes mellitus, including pregnant women.
- The Reader and Sensor are designed to replace blood glucose testing in the self-management of diabetes, including dosing of insulin.
- The indication for children (age 4 - 12) is limited to those who are supervised by a caregiver who is at least 18 years of age.
- The caregiver is responsible for managing or assisting the child to manage the Reader and Sensor and also for interpreting or assisting the child to interpret Sensor glucose readings.
- The FreeStyle Libre 2 Flash Glucose Monitoring System (“System”) has two main parts: a handheld Reader and a disposable Sensor that you wear on your body.
- You use the Reader to wirelessly scan the Sensor and display your glucose readings.
- The Reader only works with FreeStyle Libre 2 Sensors and cannot be used with other Sensors.
- The FreeStyle Libre 2 Sensor automatically communicates with the Reader and can give you glucose alarms if you choose to turn those on.
- The Reader also has a built-in meter for blood glucose and ketone testing.
- Your System comes in a Reader Kit and a Sensor Kit. When opening your kits, check that the contents are undamaged and that you have all parts listed. If any parts are missing or damaged, contact Customer Service.
- When in range of the Reader, your Sensor automatically communicates with the Reader to give you Low and High Glucose Alarms if you turn them ON.
- These alarms are turned OFF by default. This section explains how to turn on and set alarms as well as how to use them.
- Please read all the information in this section before setting and using alarms.
- IMPORTANT: What to know about glucose alarms
- Scan your Sensor often to check your glucose. If you get a Low or High Glucose Alarm, you must obtain a glucose result to determine what to do next.
- The Low and High Glucose Alarms should not be used exclusively to detect low or high glucose conditions.
- The glucose alarms should always be used along with your current glucose, glucose trend arrow, and glucose graph.
- Low and High Glucose Alarm levels are different from your Target Glucose Range values. Low and High Glucose Alarms tell you when your glucose has passed the level you set in the alarm.
- Your Target Glucose Range is displayed on glucose graphs on the Reader and used to calculate your Time In Target.
Setting up Your Reader for the First Time:
Before using the System for the first time, the Reader must be set up.
1. Press the Home Button to turn on the Reader.
2. If prompted, use the touchscreen to select your preferred language for the Reader. Touch OK to continue. Note: Use the pad of your finger. Do NOT use your fingernail or any other object on the screen.
3. Set the Current Date using the arrows on the touchscreen. Touch next to continue.
4. Set the Current Time. Touch next to continue.
CAUTION: It is very important to set the time and date correctly. These values affect the Reader data and settings.
5. The Reader now displays important information about two key topics to help you use the system:
• How to understand the Glucose Trend Arrow included on the Glucose Reading screen.
• How to return to the Home Screen from any other screen.
Touch next to move to the next topic. At the end of the Reader setup, touch done to go to the Home Screen.
Note: Charge the Reader if the battery level is low. Only use the USB cable and power adapter included with the System.

Checking Your Glucose:
1. Turn the Reader on by pressing the Home Button or touch Check Glucose from the Home Screen.
2. Hold the Reader within 4 cm (1.5 inches) of your Sensor to scan it. Your Sensor wirelessly sends glucose readings to the Reader. If sounds are turned on, the Reader beeps when the Sensor has been successfully scanned. Note: If the Sensor is not successfully scanned within 15 seconds, the Reader displays a prompt to scan the Sensor again. Touch OK to return to the Home Screen and touch Check Glucose to scan your Sensor.
3. The Reader displays your current glucose reading along with your glucose graph and an arrow indicating the direction your glucose is going.
Caution & Warnings:
Contraindications:
- The Sensor must be removed prior to Magnetic Resonance Imaging (MRI).
WARNING:

- Do not ignore symptoms that may be due to low or high blood glucose. If you have symptoms that do not match the Sensor glucose reading or suspect that your reading may be inaccurate, check the reading by conducting a fingerstick test using a blood glucose meter.
- If you are experiencing symptoms that are not consistent with your glucose readings, consult your health care professional.
- The FreeStyle Libre 2 Flash Glucose Monitoring System (“System”) contains small parts that may be dangerous if swallowed.
Cautions and Important System Information:
What the System has not been evaluated for:
- The System has not been evaluated for use with other implanted medical devices such as pacemakers.
- The System has not been evaluated for use in persons on dialysis or people less than 4 years of age.
How to store the Sensor:
- Store the Sensor Kit between 4°C and 25°C. While you don’t need to keep your Sensor Kit in a refrigerator, you can as long as the refrigerator is between 4°C and 25°C.
When is Sensor Glucose different from Blood Glucose:
- Glucose levels in the interstitial fluid can be different from blood glucose levels and may mean that Sensor glucose readings are different from blood glucose.
- You may notice this difference during times when your blood glucose is changing quickly, for example after eating, taking insulin, or exercising.
When to remove the Sensor:
- On rare occasions, you may get inaccurate Sensor glucose readings. If you believe your glucose readings are not correct or do not match how you feel, perform a blood glucose test on your finger to confirm your glucose. If the problem continues, remove your Sensor and apply a new one.
- Some individuals may be sensitive to the adhesive that keeps the Sensor attached to the skin. If you notice significant skin irritation around or under your Sensor, remove the Sensor and stop using the System. Contact your health care professional before continuing to use the System.
- If you have a medical appointment that includes strong magnetic or electromagnetic radiation, for example an X-ray, MRI (Magnetic Resonance Imaging), or CT (Computed Tomography) scan, remove the Sensor you are wearing and apply a new one after the appointment. The effect of these types of procedures on the performance of the system has not been evaluated.
What to know about wearing the Sensor:
- Do not reuse Sensors.
- The Sensor and Sensor Applicator are designed for single use.
- Reuse may result in no glucose readings and infection.
- Not suitable for re-sterilization.
- Further exposure to irradiation may cause inaccurate results.
What to know about Glucose Alarms:
- For you to receive alarms, they must be turned ON and you should ensure that your Reader is within 6 metres (20 ft) of you at all times. The transmission range is 6 meters (20 ft) unobstructed. If you are out of range, you may not receive glucose alarms.
- To prevent missed alarms, make sure the Reader has sufficient charge and that sound and/or vibration are turned on.
What to know about the Reader’s Built-in Meter:
- The Reader is designed to be used only with FreeStyle Optium blood glucose and blood ketone test strips and MediSense control solution.
- The Reader is for use by a single person. It must not be used on more than one person including other family members due to the risk of spreading infection. All parts of the Reader are considered biohazardous and can potentially transmit infectious diseases, even after cleaning the Reader.
- Avoid getting dust, dirt, blood, control solution, water or other substances in the Reader’s USB and test strip ports.
Interfering Substances:
- You can take standard doses of ascorbic acid (vitamin C) and still make treatment decisions with the Sensor.
- Taking higher than the maximum recommended daily allowance (RDA) of ascorbic acid may affect the Sensor readings and make them look higher than they really are.

